

Curtains are one of the easier parts of a room to change without replacing furniture or repainting walls. A pair that looks too long, too plain, or slightly unfinished can often be improved with a hem, new hanging method, decorative trim, or a different use of fabric you already own.
The useful DIY projects are usually the simple ones. They solve a visible problem at the window without turning the project into a complicated sewing exercise or producing something that looks improvised rather than intentional.
Start With the Curtains You Already Have
Buying new fabric is not always the best first step. Existing curtain panels may already have the right color, opacity, and general size, which means a small change can do more than replacing them with another inexpensive pair.
Look at what is actually bothering you before choosing a project. Curtains that drag awkwardly on the floor need a different fix from plain panels that fit correctly but lack character.
A few changes make especially good DIY candidates:
- shortening panels that are too long;
- adding trim to plain curtains;
- changing from a rod pocket to clip rings;
- turning suitable fabric into simple curtain panels;
- making café curtains for partial privacy;
- reusing sound curtain fabric for a different window.
If the real issue is proportion rather than the curtain itself, getting the length, fabric and scale right is worth resolving before cutting anything. A DIY alteration cannot compensate for a treatment that is fundamentally the wrong size for the window.
A No-Sew Curtain Hem Can Fix the Most Obvious Problem
Curtains that stop at an awkward point often look more unfinished than curtains made from inexpensive fabric. Shortening a too-long panel is therefore one of the highest-impact DIY curtain projects, and it does not necessarily require a sewing machine.
Iron-on hemming tape creates a bonded fold between layers of fabric. IKEA’s hemming-tape instructions describe the basic process as cutting the fabric to size, folding the hem, placing the strip inside, and fixing it with a warm iron.
The preparation matters more than the speed of the project. Hang the curtain first, decide where you actually want it to finish, mark the length at several points, and remove the panel before making the final fold.
If the curtains are washable, check the care label and consider washing them before shortening them. Some fabrics can shrink, and a carefully measured floor-length panel is much harder to repair after it becomes noticeably shorter in the first wash.
When Iron-On Hem Tape Is Not the Right Choice
Heat-activated tape only makes sense when the curtain fabric can tolerate the required iron temperature. IKEA specifically warns that its hemming strip is not suitable for fabrics that require a low ironing temperature, so the care label should come before the iron.
Heavy fabrics can also demand a stronger bond than very light panels. If the hem repeatedly releases, sewing becomes the more dependable solution rather than adding layer after layer of adhesive.
A visible test area is a poor place to discover that heat changes the fabric’s finish. Test the method on an offcut or inconspicuous section whenever the material is unfamiliar.
Add Trim Instead of Replacing Plain Curtains
A curtain can fit perfectly and still feel visually flat. Adding a narrow band of trim is a more controlled update than replacing an entire pair just because the fabric lacks detail.
Trim can run vertically along the leading edge, horizontally near the bottom, or in a restrained border that follows the outer edge. Geometric tape, woven braid, velvet ribbon, or a simple contrasting textile band can all work, depending on the room.
Lowe’s suggests adding trim to plain drapes and notes that hem tape can be used as a no-sew alternative to stitching it in place. The idea works best when the trim has enough contrast to be visible but does not compete with every other patterned surface nearby.
Placement should look deliberate. A narrow vertical trim along the inside edge is usually easier to integrate than several decorative bands scattered across the same curtain.
Clip Rings Can Change How a Curtain Hangs
Curtain clips are useful when a panel has the right dimensions but the existing rod pocket makes the top look stiff or awkward. Clips introduce small folds and allow the fabric to fall from separate points rather than wrapping the rod inside a continuous pocket.
Spacing matters because irregular clips create irregular folds. Lay the curtain flat, place a clip near each outer edge, and divide the distance between them evenly before attaching the rest.
The clips also affect final length. A panel that previously hung directly from a rod will usually sit at a different height once rings or clips are introduced, so test one panel before modifying the entire set.
This is one of the easiest reversible curtain projects. If the look does not suit the room, the clips can come off without cutting or permanently changing the panel.
Simple Fabric Panels Do Not Need Complicated Sewing
A rectangular length of suitable fabric can become a basic curtain panel with surprisingly little construction. Most of the work is in measuring carefully, finishing the visible edges, and choosing a hanging method that suits the weight of the material.
Clip rings are especially forgiving because they remove the need to sew a rod pocket or install grommets. A finished top edge can simply sit beneath the clips, while the side and bottom edges receive sewn or bonded hems.
Avoid treating every attractive textile as curtain fabric. The material should hang rather than remain stiff, tolerate the light exposure at the window, and provide the level of privacy the room requires.
Patterned fabric needs additional planning because two panels should relate to each other when they hang side by side. Cutting without considering the pattern repeat can leave one curtain visually higher or lower than the other even when their physical dimensions match.
Café Curtains Are a Manageable Small-Scale Project
Café curtains cover only part of the window, which makes them a practical DIY project for kitchens, breakfast areas, bathrooms, and other spaces where lower-level privacy matters more than complete coverage.
Because the panels are shorter, they require less fabric and are easier to handle on a table or ironing board. A simple café curtain can use a narrow rod with rings or clips, avoiding complex headings altogether.
The placement should respond to the actual sightline from outside rather than an arbitrary halfway point. On one window, covering the lower half may be enough; on another, the privacy line may need to sit noticeably higher or lower.
Café curtains are also appearing again in current interiors, so the project connects naturally with the softer and more layered direction in our 2026 curtain trends. The DIY version still works best when the room actually benefits from partial coverage rather than when the style is added only because it is fashionable.
Choose Café Curtain Fabric for Light as Well as Pattern
A small curtain can carry more pattern than a large floor-to-ceiling panel without dominating the room. Checks, narrow stripes, small botanicals, and plain woven fabrics can all work in the right setting.
Hold the fabric against daylight before deciding. A pattern that looks subtle on a table may become much more graphic when the window illuminates it from behind, while an apparently opaque material may reveal more than expected.
Washability matters in kitchens and bathrooms, where steam, cooking residue, and frequent handling are harder on fabric. A material that needs delicate treatment may become inconvenient surprisingly quickly in either room.
Give Plain Panels Character With a Narrow Fabric Border
Trim does not have to come from a roll. A strip of contrasting fabric can create a wider border along the leading edge or bottom of an existing panel and make inexpensive curtains feel more specific to the room.
This project requires more attention to straight lines than a narrow braid does. Cut the border consistently, press the folds before attaching it, and check both panels together so the finished widths match.
A border can also solve a small length problem when added to the bottom of curtains that are slightly too short. The added section should look intentional, though, rather than like a last-minute extension using whatever fabric happened to be available.
Two-tone curtains work best when one color clearly dominates. Keeping one large field of color also makes the added border read as a design choice instead of dividing the curtain into a series of unrelated bands.
Upcycle Old Curtains Only When the Fabric Is Still Worth Using
Upcycling makes sense when the curtain fabric remains in good condition but no longer fits the original window or decorating scheme. Faded edges, sun damage, brittle fibers, or permanent stains are signs that the material may not be worth rebuilding into another window treatment.
Large sound sections can sometimes become smaller café curtains, narrow panels, fabric borders, or tiebacks. Reusing only the best part of the material often produces a cleaner result than trying to preserve the original curtain shape.
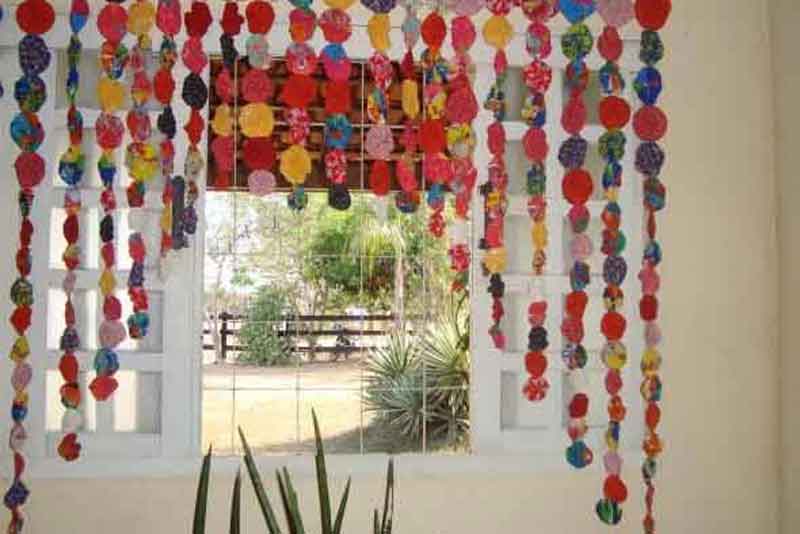
Not every household textile makes a convincing curtain simply because it is large enough to cover a window. Scarves, shower curtains, sheets, and other repurposed materials can behave very differently in terms of drape, opacity, scale, and resistance to long-term light exposure.
Repurposing works better when the material already behaves like furnishing fabric. A good-looking textile is not automatically good curtain fabric, especially when the window needs dependable privacy or regular opening and closing.
Curtain Tiebacks Are Useful When They Match the Way the Curtains Hang
Tiebacks are a small DIY project, but they change the silhouette of the entire curtain. A simple fabric band, cord, leather loop, or restrained decorative tie can pull a panel away from the glass and reveal more of the window during the day.
The position matters. A tieback placed very low can make the upper curtain balloon outward, while one placed too high may compress the folds into an awkward bundle.
Use the curtain itself to find the point where the fabric gathers naturally before fixing any wall-mounted hook. Temporary testing avoids unnecessary holes and makes it easier to compare both sides of the window.
Fabric scraps from another curtain project can work well here because the smaller scale makes exact matching less important. A related color or texture is often enough to make the detail feel connected.
Painting and Dyeing Curtains Needs More Caution Than Social Media Suggests
Fabric paint, stencils, and dye can produce distinctive curtains, but these are less predictable projects than adding trim or changing a hem. Fiber content, existing finishes, washing history, and the original color all affect the result.
A stencil can work on a plain panel when the fabric lies flat and the paint is compatible with textiles. Large repeated motifs require careful spacing, however, because even a small alignment error becomes obvious once the full curtain is hanging.
Dyeing has even more variables. Synthetic fibers do not necessarily respond to dyes formulated for cotton or other natural fibers, and two supposedly identical panels can take color differently if their wear or sun exposure differs.
These projects make more sense for curtains you are willing to experiment with than for an expensive pair that only needs a minor refresh. Testing a small area first gives you a chance to abandon the idea before both panels are permanently changed.
Small Details Can Make DIY Curtains Look More Finished
What makes a DIY curtain look finished is usually measurement and repetition rather than the number of techniques involved. Straight hems, equal panel lengths, evenly spaced clips, and matching trim placement matter more than adding several decorative ideas at once.
Before calling the project finished, hang both panels and look at them from across the room. The window reveals inconsistencies that are much harder to notice when the fabric is lying on a work surface.

A short finishing check catches most avoidable problems before they become part of the room. Many of these corrections take only a few minutes while the panels are still easy to remove:
- confirm that both panels end at the same height;
- check that clips or rings are evenly spaced;
- press visible folds and hems where the fabric allows it;
- trim loose threads;
- make sure added decoration aligns between paired panels;
- open and close the curtains to confirm that the alteration still works in everyday use.
A curtain that looks good only when arranged for a photograph is not a particularly successful DIY project. The final treatment should still move, close, wash, and provide the privacy or light control the room needs.
The Best DIY Curtain Projects Fix One Thing Well
A useful curtain makeover does not need six materials and an afternoon of decorative techniques. Shortening an awkward panel, adding one clean border, switching to clip rings, or making a simple café curtain can be enough to change the window noticeably.
Start with the problem that is already visible and choose the least complicated alteration that solves it. When the proportions, fabric behavior, and practical function remain intact, a DIY curtain tends to look like part of the room rather than a craft project attached to the window.